Step 1
All coins begin as a design, which is made by an artist who may prepare the artwork by hand with paper and pencil or using computer software. An effective coin design is the product not just of a designer’s artistry or skill but of his or her research skills and the ability to work from a huge range of visual references. Coin designers are gifted artists, who develop scenes and impressions not only on a refined space and shape, but also with a 3-dimensional aspect, using different heights and surface structures of the coin to enhance their designs.
Many coin designs start with a number of different designers handing in their proposals and a committee choosing the best of them. Some coins are issued as part of a series with design elements that are repeated or link each of the coins in a collection.
Step 2
The selected design and all its details are transferred on to a plaster mould made up to five times the size of the intended coin. Working on this larger scale enables the artist to perfect the design to the finest detail. Today this is done by computer software.
Step 3
This is the sculpting stage that renders the design in relief rather than as a flat illustration. Working with small tools on clay, the sculptor creates a three-dimensional sculpt that forms the basis of the coin relief and is in effect a negative of the finished coin. As only plaster is being used at this stage, any errors can be corrected easily.
If you view a coin through a magnifying glass can often see the different layers that make up a good coin design. Coin designs are like little sculptures and different sizes and thickness of coins present different challenges for a designer.
Step 4
The design on the plaster is then transferred on to a rubber resin mould, which is then used to make an epoxy resin mould. The matrix is mounted on to a reducing machine called a transfer-engraver. The machine then reduces and transfers the design to a carbide tool that cuts the design into a blank steel die.
Step 5
The transfer-engraver uses a stylus to trace the exact contour of the mould on to an engraved master die. This die is the same diameter as the coin to be struck.
Step 6
A master die is used to produce working dies for the striking process. Due to the tremendous pressure, these will wear off after a certain number of strikes.
Step 7
The coining metal is supplied in huge coiled strips which are cut into the required shapes by blanking presses. The blanking press then punches out blank discs of metal to be used for minting the coins.
Step 8
The blanks are checked and then passed into the annealing and blanching stage, to be washed and brought to a brilliant light lustre suitable for coining
Step 9
Proof blanks are fed by hand into automatic presses. Proof quality does not allow any mass production.
Step 10
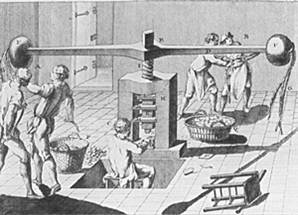
The final, actual minting stage is the transfer of the design to the metal coin blanks to be struck. The blank is impressed between the two dies with variable pressure that can reach several hundred pounds per square inch. The pressure and duration of each strike will vary according to the metal type and coin characteristics. The press of the dies on the blank form the shape of the finished coin. The number of strikes a given coin will receive is depends on the material used and the required finish, which could be a mirror-like finish or one that appears antiquated. Some coins may even receive a hand-painted finish.
Step 11
Now struck, the coins go through a final inspection to check for flaws. They are then capsuled and packaged.


